Pages

Wednesday 25 February 2015

Oh Laney! I Swoon over you!

I decided to revive my blog - not that I have more time than before, no, I just have some new pretties to show! Last year, I was lucky enough to find Swoon Patterns, and I must say, I am loving them!!  Visit the page at http://swoonpatterns.com/ - you won't be sorry!

This is the lovely Laney, and she's a hobo style bag. I added a small flap and snap closure - so she's not reversible as the pattern was written, but I love her just as she is! I used a gorgeous fabric that a friend of mine gave to me, and a thick yellow cotton in the centre. I embroidered the flowers on the front and the single flower on the back, as I thought it lacked something with the plain yellow. I am really pleased with her, and I'm not sure how I will part with her. When I've made a few more beautiful bags, I will be listing them on Etsy!


Thursday 15 August 2013

I've WON!!!

Oh my goodness me!! I've only gone and won a competition!! A huge thank you to Minerva Crafts (http://www.minervacrafts.com) for hosting such an awesome competition! Out of 224 projects submitted, mine got the most votes! I loved seeing all the projects - so many colours and designs!

This is the bag that won - it's a kids messenger bag, and is made entirely from a Fat Quarter. The fabric is also from Minerva Crafts! I've sold it now, but I'll be making some more this week.

I am super excited about winning, and thank you so much to everyone who voted. I'll post a picture of me with my prize when it arrives.

Please visit my Facebook page: https://www.facebook.com/TheVeryFatQuarter to see more bags, and more news. There are quite a few bags that I've not taken pictures of yet, but I will be doing that next week after the next round of weekend fairs. The mini lunch tote bags are also proving to be veeeery popular!

--------------------------------------------------------

Saturday 1 June 2013

Kids Bags

Well, it seems that after declaring that I had 'no interest in making children's bags', I've landed up doing exactly that. I really ought to know better. 'I've no interest in making soap again' ..... a few months later, I was making soaps. 'I've no interest in sewing again' .... aaaand a few months later, I'm sewing handbags. So beware anyone if I say 'I have no interest .... ', as you never know what I might be getting up to next!

Now, I really would LOVE to be able to make clothes, but I seem to lack the skill needed for that item. Oh well, you can't win 'em all.

Here are some of the bags I've recently made for a fair coming up later this month (eep!!).


Tuesday 21 May 2013

AWOL - Again!

Okay, lets face it, I'm rubbish at this whole blogging thing. Seriously. (I know, it's a surprise to me too!) I post every day for a week, then nothing for months. People think I've fallen off the edge of the world, and are readying speeches for my wake .... then I pop up again with another post. HIYA!!

Thing is, I get really busy with ... well, 'stuff'. I'm making, then sorting kids, then making some more, then kids again, then tidying, then shower the kids, then kids to bed, then make some more (and a fair bit of Facebook in between too!) then fall into bed for a few hours, only to wake up and do it all over again. ... Sound familiar? But I love it. I love the making and my kids are great - even if they drive me batty!

So, in short, I promise to post infrequently, with long intervals between, or short ones. But, I will post! So no change there then.

You're all very welcome to join me on my Facebook page, I post slightly more frequently there, and I even have a few photos too!

Tuesday 26 March 2013

New Denim Bag

I feel I must start this post with an apology. It would seem I'm rubbish at this blogging malarkey. You hear from me almost every day, then nothing for weeks on end. I am sorry. Studies first stopped me from blogging, now it's just life in general. Now, onto the making.

This is a looovely denim bag that I've made, and lined it with a sun and moon cotton fabric. It just cried out for something pretty on the front, and buttons seemed to be the obvious choice.

There's the standard zip pocket on the inside, and two pockets on the outside. It could be reversed if desired.

There's double stitching on the shoulders for extra strength, and the buttons have all been hand sewn on with invisible thread.

It is machine washable, and can be ironed too.

To purchase this bag - please visit my Folksy shop: http://folksy.com/items/4275118-Denim-Bag-with-Sun-Moon-Lining. If it is no longer available, please feel free to contact me.


Thank you for looking. I will try to blog more often.
-------------------------------------------------------------------------

Thursday 14 February 2013

Greetings!

 Hello everyone! I am so sorry for not updating my blog for such a long time - I had to abandon my sewing and workroom in order to finish my studies. I did a very intensive course on Teaching English as a Foreign Language (TEFL for short). It was AWESOME! I loved it, and got pretty good grades. But now, I'm back!!  And to celebrate, I made this lovely bag. It's so big, you could almost travel overnight with it. It's made with black denim and cotton elephant fabric. No particular brand name.

I used a pair of denims, and cut them up, and used the zip for the inside zip pocket. There are also four large pocket inside, large enough for your phone or other goodies. There are two cute little pockets on the front, and a large pocket on the back. The straps are made from denim and cotton fabric. The stitching is done in the biscuit colour, and there is accent stitching on the handles and down the sides of the bag. The main bag has a very sturdy metal zip, which will keep everything secure.

If you would like to buy this bag, or would like to see any of my other items for sale, please visit my Facebook page (https://www.facebook.com/TheVeryFatQuarter).


________________________________________________________

Sunday 4 November 2012

Placemat Tutorial

This is my first ever tutorial on a blog, and I really hope that it comes out okay. Now, I know that there are many, MANY tutorials out there for placemats, but ..... why not have yet another?! There are quite a lot of photos, so grab a cuppa, get comfy, and have a looksee.

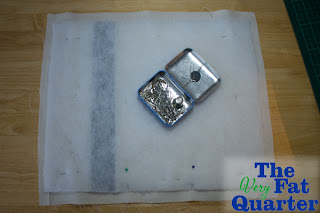
11 1/2" x 14" Placemat Tops
11 1/2" x 14" Batting / Wadding
15 1/2" x 13" Backing
Rotary Cutter
Cutting Mat
Optional - AD505 Temporary Spray Adhesive
All your usual sewing tools

Step One
Make your placemat top. This can be pretty much anything you want. It can be patchwork, a single piece of fabric, or anything else you like. My tops are 11 1/2 inches x 14 inches, and include a 1/4 inch seam allowance.

Step Two
Now, attach your batting to the top. You can use pins, but I use a temporary spray adhesive (AD505) which doesn't gum up the needle, and washes out without leaving any sticky residue. This step is optional, but, it gives the placemat a little more padding, and thus protects your table a little more.

Step Three
Cut your backing fabric. This can be anything you like - patchwork (then they can be reversible) or a single piece of fabric like mine. I cut mine quite a bit bigger than the front for this tutorial, to allow for lots of movement with the sewing later. If you're more confident, you can cut yours the same size as the topper. Just remember, its easier to trim some of the fabric away, than to panic if the fabric's moved.(I speak from experience!) I cut mine 15 1/2" x 13". That was probably a little too big, but I wanted to be sure it was going to still fit afterwards!

Step Four
Take your placemat top, and place it right side down ontop of the backing, and pin it to the backing. (The adhesive would not work here, as you need to turn it the right way around soon.)


When pinning the top use two pins to mark where you are going to leave a gap. This is where you're going to turn the mat right way round. Make sure you leave a gap a bit larger than the width of your hand.


Step Five
Now, sew a 1/4 inch all the way around your mat, except between the two pins marking the gap. I had the batting up, so that it didn't clog up my feed dogs. When you start at the pin marking the gap, backstitch a few stitches to reinforce the area. Then, when you come back to the pin marking the gap, backstitch a few stitches again.


Step Six
Trim away any excess backing and batting, aligning with the topper fabric. Be careful not to cut the stitches. Also, trim the corners away to reduce bulk when turning.


Step Seven
Reach in through the gap that you left, and grab hold of the topper and batting, and pull it through the gap. Poke out all the corners, but be careful not to push too hard, as you may push through the stitches. Do not use a seam ripper for this task, as it has a very sharp point. Something with a blunt point would be much better.


Step Eight
This is the point that most other tutorials tell you to hand stitch the gap closed. You can do this if you like. I however have too little time for hand sewing, so I simply press the mat (it will loose some of it's fluffiness), making sure that the edges of the gap are nicely aligned, then top stitch it 1/8" all the way around the mat. Since your seam is 1/4", the 1/8" topstitch will close the gap nicely. Tie up, trim and bury all the knots and tails.


Step Nine
Now you need to sew a few lines across the mat. This will stop the batting from falling apart, or separating from the top. You can use any type of quilting you like. I used straight lines as it was pretty simple and fitted in with my theme. I did not sew over the burgundy strip. I sewed a 1/8" either side of it, and then the straight lines stopped at that line. Now, tie off the tails, bury and trim them as normal. Give the mat a final press to set all the stitching and give it a nice professional look.


Step Ten
Step back, admire your gorgeous work, then make another three, or five, or as many placemats as you need. These are lovely to give as a gift, or to make for special occasions. You can match fabrics from tablecloths, other interior decor, or even use novelty fabric. Just make sure that any fabric you use, can be washed in the washing machine. Also, be aware of colours - white is not a good choice for an everyday mat, but can be used for a special occasion. Here, I've used a tea stained cotton fabric, and a strip of cotton fabric. 


And that's all there is to it. If you have any questions, please feel free to ask.

__________________________________________________________